
Many chefs have asked us how to host a successful cooking class, so I want to share our practical tips for success. This post will walk you through:
- 5 reasons to host a cooking class
- 9 types of cooking class themes to try
- 9 types of profitable cooking classes customers
- The best time of the year to host a cooking class
- 9 requirements for a cooking class venue
- 6 cooking class venue options to book
- How to schedule your cooking class
- How to advertise your cooking class
- How to teach your cooking class
Let’s start with a fundamental question:
Why you should host a cooking class
A cooking class brings people together, teaches them how to cook, builds your brand, sells related products, and helps you build a wealth ladder.

Bring people together
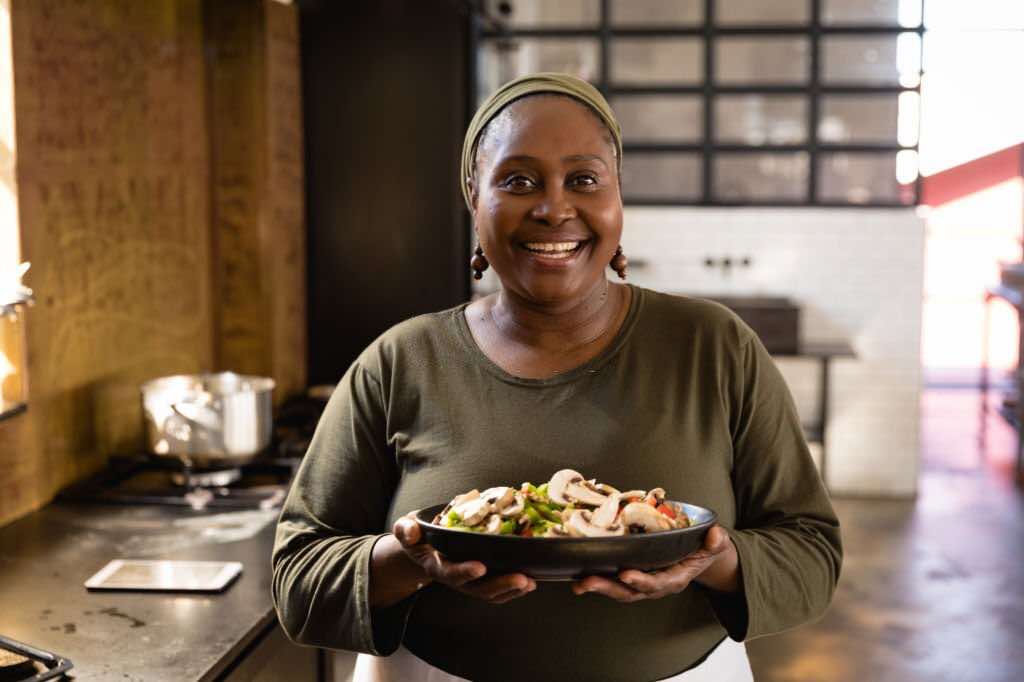
Rule #1: A cooking class is about the people, not the food. This makes your cooking class primarily a networking and relaxation event, not an educational event.
This distinction is key. We originally focused too much on the food and learned through feedback that people come together to learn cooking skills from you, make friends, and have a good time, not to become the next Gordon Ramsey.
A cooking class teaches you critical skills, such as:
- How to plan and host an event
- How to map out different food recipes
- How to structure an enjoyable learning experience
These skills help you expand your brand and create more memorable experiences.
Build your brand
The more cooking classes you host, the faster your brand grows. Past a certain point, your brand becomes your edge over your competitors. Any chef can cook, but not all have a strong enough brand to convert new customers into superfans at a higher profit margin.
Teach people
Teaching is a powerful skill, and people are willing to pay to learn cooking skills. Becoming a great teacher or chef instructor helps you augment your food-based business with extra income.
The more classes you host, the better you get at imparting knowledge about recipes, ingredients, wine pairings, and cooking equipment — and the easier it gets to sell these things later on.
Sell products
Cooking classes present an opportunity to sell related products. For example, you can sell well-paired wines, aprons, cookbooks, crockery sets, t-shirts, and even tickets to your next cooking class.
Build a wealth ladder
As more and more people learn about your cooking classes, they’ll attend more events, invite their friends, buy your merchandise, book you for a private cooking class, hire you for corporate events, and so on.
View each cooking event as a flywheel that helps you sell other products. This will help you set and manage your expectations.
9 types of customers for cooking classes
Based on our attendance register, we’ve honed in on the following types of people who pay for cooking classes:
- Foodies who enjoy cooking
- Companies wanting a team building event
- Bachelor/ettes who are tired of takeout
- Pregnant women who want to eat healthier for two
- Professional chefs who want to get better at cooking
- Couples who want a fun, romantic activity to do together
- Moms who want to prepare healthier meals for their families
- Culinary students who want extra training outside the classroom
- Busy professionals who want to learn how to cook quick meals easily
Each of these specific audiences provides a potential cooking class theme to host. Your cooking class(es) will likely have a mix of the above groups, and you might even get some unexpected attendees who have their reasons for wanting to learn how to cook.
Note: Most people think that cooking is a long, complicated process. This is why they avoid the kitchen and reach for delivery apps instead. Much of your food content plan (more on that later) should address this misconception to drive more signups.
9 types of cooking classes to host
What type of cooking class should you host? The right theme attracts people who are specifically interested in that cooking style and who are hoping to meet others like them.
Remember: Cooking classes are about networking and relaxation, not food.
A cooking class that teaches people how to cook ten wildly different dishes will attract no one. It’ll be harder to sell merchandise since not all attendees have the same interest.
Conversely, a class that promises to teach you ten plant-based dishes or ten meaty dishes will attract a lot more enthusiastic attendees. You can sell more vegan recipe books or discount coupons for grills, respectively.
Food is diverse, so you have a wide range of themes to choose from. Here are seven cooking themes to try:
- Frying cooking classes
- Pastry cooking classes (chocolate, cakes, etc.)
- Plant-based cooking classes
- Meat-based cooking classes
- Grilling classes using coal, gas, etc.
- Cultural cooking classes (Italian, Greek, Mexican, etc.)
- Spices and rubs (teaching you to master different spices and their applications)
You can go even deeper and offer cooking classes for people with specific conditions. For example, people with hypertension, diabetes, indigestion, or ulcers all have special diets and would benefit from learning how to manage those conditions through food.
You can also do age-based cooking classes, such as cooking classes for children or cooking classes for elders. Your creativity is limited only by your imagination.
Best time to host a cooking class
The best time to host a cooking class is during the warmer months of your location’s climate, toward month-end when people have money.
Theoretically, you can host a cooking class at any time of the year, but certain periods will make it harder to get signups.
For example, January is usually a tight month for most people, and their budgets may not allow for a cooking class. Likewise, December is busy with everyone planning holidays.
Winter is also challenging to host cooking classes as most people are reluctant to leave their houses.
Stick to summer months and month-end weekends for maximum attendance and profits.
Cooking class venues: 9 essential requirements
A cooking class is a physical get-together, so you want to book a space that’s close enough to your target audience and affordable enough for your budget. Your most critical requirements for any venue are:
- Space
- Seating
- Ventilation
- Pest control
- Cleaning utensils
- Crockery and cutlery
- Energy (gas or electricity)
- A sufficient number of cookers, ovens, or grills
- A gracious host or point of contact that’s easy to work with
Space
Depending on how many students attend your cooking class, they’ll need space to move around and store their ingredients, utensils, and recipe books or lists. Cramped spaces limit movement and may run afoul of social distancing directives in your area.
Seating
Your students and staff need to sit and work or eat. The more chairs and tables the venue has, the more comfortably everyone can enjoy the event. Ensure enough chairs, tables, couches, and bean bags.
Ventilation
Ventilation reduces strong odors from the food, smoke from the cookers or grills, and sweat from yourself and your participants. People enjoy your classes more when they can breathe easier.
Pest control
Kitchen pest control keeps flies, mice, cockroaches, and other disease carriers away. Nobody wants to cook creamy pasta while tap-dancing on cockroaches.
Check that there are enough pest-control equipment and chemicals and that there aren’t any cracks or holes pests can get through.
Cleaning utensils
Cleaning tools help your students clean up as they go and help you clean up after the event. Check if the venue has a cleaning crew and pay whatever the fee is to save time.
Crockery and cutlery
You’ll need enough pots, pans, spoons, spatulas, forks, cups, bowls, and plates — and it’s better to have more than you need. Check with the venue beforehand, and bring extra crockery and cutlery if needed.
Energy: gas or electricity
Gas ovens cook food faster, and gas is relatively cheap. Electricity is easier to use, but it might be unreliable if you live in a country that suffers from load-shedding. Our advice is to go with gas.
Cooking equipment
The more cookers, grills, and ovens you have, the more you can divide your participants into small groups and the more recipes you can try.
Two attendees per cooking station is a good number — use three if you’re short on equipment. More than that, and people won’t participate enough.
Venue manager
Your venue manager should do quality checks, offer transparent pricing, and help you make informed decisions. Most of all, they should be easy to work with.
Before booking a venue, get references from previous chefs, check their reviews online, and ask a million questions. It’ll save you headaches down the line.
6 types of venues to host a cooking class
Consider these six venue options for your next cooking class:
- Cooking studios
- Culinary schools
- Local restaurants
- Hotels and lodges
- Local school cafeterias
- Parks and recreational areas
Cooking studios
These venues are specifically designed to host cooking classes and product launches, so they come with most of your requirements sorted. A quick Google search for cooking studios should yield several options, especially if you live in a metropolitan area.
Culinary schools
A cooking school comes equipped with aprons, equipment, cleaning staff, and even instructors you can hire. Many also have space earmarked for rentals.
You might snag a long-term gig as an adjunct staff member or in-house instructor with the culinary school.
Local restaurants
A restaurant is a cooking studio by another name. Mine your networks for restaurant owners who are willing to rent out their kitchens during off-days (e.g., Sundays and Mondays) or off-season. You get space, equipment, seating, and a bar for drinks.
Hotels and lodges
Hotels and lodges make for excellent venues since they cater to large numbers of people at a time. While you might have a harder time booking busier spots, you can easily get an out-of-town lodge or one that’s operating during their off-peak season.
School cafeterias
Like hotels and lodges, primary and high schools must cater to many people at once, so they have the necessary equipment and seating. It’s easier to book a school for a cooking class during the holiday season, for example, or on weekends.
Parks and recreational areas
Local parks are great for meat-based or grill-based cooking classes. You can also use your local golf course or the grilling area at an apartment complex.
These places have built-in ventilation (the open sky) and seating (benches). However, they may not be strong on pest control (since they’re outdoors) or cooking surfaces for everyone.
You can solve these challenges by bringing pest control stations and hiring tables from a catering or event management company. This may raise your costs.

How long should your cooking class take?
Keep your cooking classes under two hours. The whole point of a cooking class is to learn how to cook specific dishes quickly and easily. A long class contradicts that expectation.
Here’s how to structure your cooking class schedule:
- 20 minutes for arrivals, intros, and welcome drinks
- 20-30 minutes for food prep
- 20-30 minutes for cooking
- 20-30 minutes for eating
- A few minutes for pics
How to plan and advertise a cooking class
Hosting a cooking class can be stressful, but advance preparation negates much of that stress. Here’s a step-by-step guide on how to plan your next cooking class:
- Gauge demand and interest
- Secure a venue and date
- Advertise your class
- Host your class
- Analyze results
Gauge demand and interest
The first step is to gauge demand and interest in your cooking class. This tells you whether it’s worth your time and money to invest in one.
You can float the idea of a cooking class to your contacts or on social media. Provide an email address or phone number for people to register their interest or put down a deposit.
You can always refund payments if the class never happens, but you can’t get your money back after booking venues, hiring assistants, and buying ingredients.
Assume that half the people who register their interest won’t show up and that the other half won’t pay until the last minute. This sets your expectations for attendance numbers and profit margins.
The more specific your cooking theme, the greater the interest you’ll register, and the more likely people will pay in advance.
Secure a venue and date
Once you’ve determined sufficient interest, secure a venue next — and always have a backup option.
Your chosen venue might cancel your booking last minute, lack a specific feature or equipment, or close down. A backup venue protects your event and minimizes brand damage.
Advertise your class
With a venue secured, it’s time to promote the event through content and ads. Post the upcoming class on your social media channels and to your mobile contacts.
Talk about who it’s for, what they’ll learn, how it’ll help them, and what they can expect. The more details you provide, the better.
You can also partner with local restaurants and chefs to spread the word and sell more tickets. If you’ve got a neighborhood association or workgroup, let them know as well.
Then, run ads to scale your reach. You can drive traffic to a landing page on your website (build one with WordPress), a temporary landing page (built with Unbounce or Leadpages), or an event page (e.g., on Computicket or Webtickets).
Ensure your landing page is payments enabled and linked to PayPal, PayFast, Stripe, or whatever payment method you prefer.
If that’s not possible, add your payment details to your ads and content and provide an email address for people to send proof of payment.
Next, design great posters with Canva or hire a designer to create them for you. This is not the time to scrimp and save — first impressions matter.
Then, run ads on Facebook and Instagram, or hire a digital marketer or social media manager to help you with your campaign.
Analyze your results
Beyond the food, finances, and friendships, cooking classes provide you with information that informs your future events and brand strategy. After your cooking class, try to answer the following questions:
- How many people showed up vs. the number of registrations? This lets you adjust your expectations in the future.
- How difficult were the recipes for your attendees? You can dial the challenge up or down accordingly.
- Which dishes did your attendees enjoy cooking and eating? This gives you ideas to focus on in your next cooking class.
- What types of attendees showed up? You might uncover entirely new audiences.
The more you know about each event, the fewer mistakes you’ll make in the future, and the higher your success rate becomes.
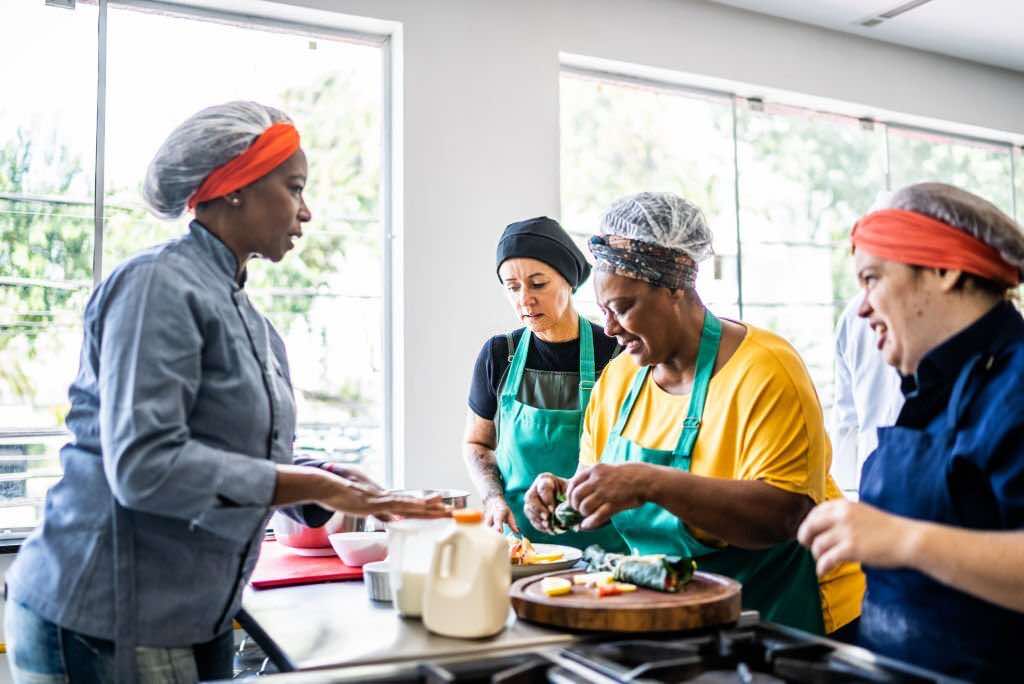
How to teach your cooking class
Throughout your class, keep the atmosphere positive and engaging. Encourage your students to ask questions and share their own cooking experiences.
Every class and group of students will have its own unique dynamics, so remain adaptable. For example, high-profile clients need quick and efficient solutions for tight schedules.
International clients need schedule adjustments for different time zones, and small business clients need personalized and tailored solutions due to budget constraints or specific needs.
The choice of teaching style for your cooking class depends on the event type, group size, students’ skill level, and class goals:
- Demonstration: You demonstrate each step in creating a complex dish such as a soufflé, while the students watch and take notes. This style works well for large groups and can be helpful for beginners.
- Hands-on: Students cook the dishes themselves with guidance from the teacher. This is great for small groups and those who prefer a more immersive learning experience.
- Collaborative: You and your students work together to create a dish. This is a fun and interactive way to learn and encourages teamwork and communication.
- Lecture: You present information on the recipe and cooking techniques. This is suited for larger groups and those who prefer a more traditional classroom-style learning experience.
Hosting a cooking class requires a relaxed environment because cooking can be stressful and challenging, especially for beginners. Everything in the kitchen is a teaching moment.
Here’s a 6-step guide on how to teach your cooking class:
#1 Plan the cooking class structure
Determine the topics you want to cover and organize them in a logical sequence. Consider the skill level and interest of your students.
Balance out the recipes for each group in a way that keeps everyone busy with a task. For example, if one group has a dish that requires a longer cooking time, give them tasks they complete in stages or tasks to do while the dish is cooking.
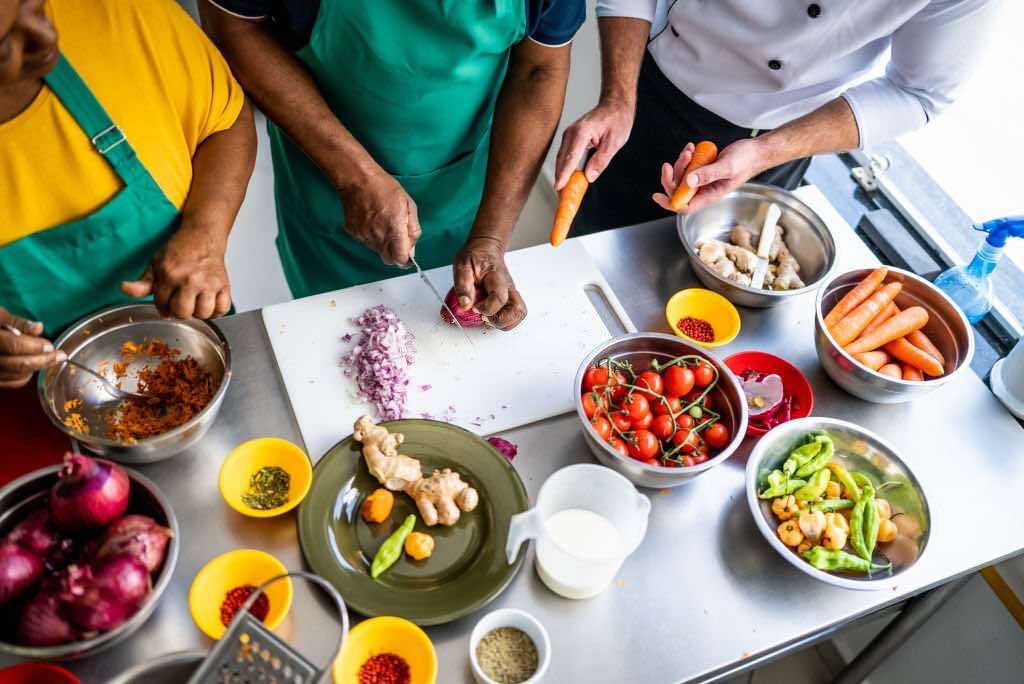
#2 Gather supplies and ingredients
Compile and gather a list of all the equipment and ingredients you’ll need for the class ahead of time. Ensure you have enough for each student.
Depending on the class size and recipe, you can portion out ingredients for convenience.
#3 Set up the kitchen
On the big day, arrive early (3-4 hours early) to set up and do last-minute checks. We highly recommend getting an assistant for your cooking class, as it’ll free you up to oversee the event instead of doing admin.
Set up a clean and organized workspace and cooking stations before the class begins. Students should easily access tools and ingredients.
#4 Introduce the lesson
As your guests arrive, welcome them with a drink and settle them in. Do intros and allow them to make small talk with each other — this builds rapport.
Begin the class by introducing the lesson goals and objectives and explaining what you will cover.
#5 Teach using your selected approach
If you are using a demonstration-style approach, show the students how to perform the techniques they will be using. Provide clear, step-by-step instructions and allow time for questions.
Divide them into pairs or small groups and assign them a recipe and cooking station.
If you are using a hands-on approach, give the students time to practice the techniques they have learned. Divide them into pairs or small groups and assign them a recipe and cooking station.
If you are using a collaborative approach, encourage students to work together and share ideas. Facilitate and guide group discussions as needed.
As they cook, assess their progress. This might involve advising on ingredient amounts and tasting finished food.
#6 Taste and evaluate
At the end, gather all the dishes on a central table and let everyone take photos. User-generated content generates FOMO, creates memories, and increases your brand’s reach.
Food photography depends heavily on good lighting, so add this to your checklist when searching for venues.
Finally, dig in. This is the best part of attending a cooking class, and the part people will remember most fondly.
End the class with a recap of the lesson and any key takeaways. Provide resources and suggestions for further learning or practice.
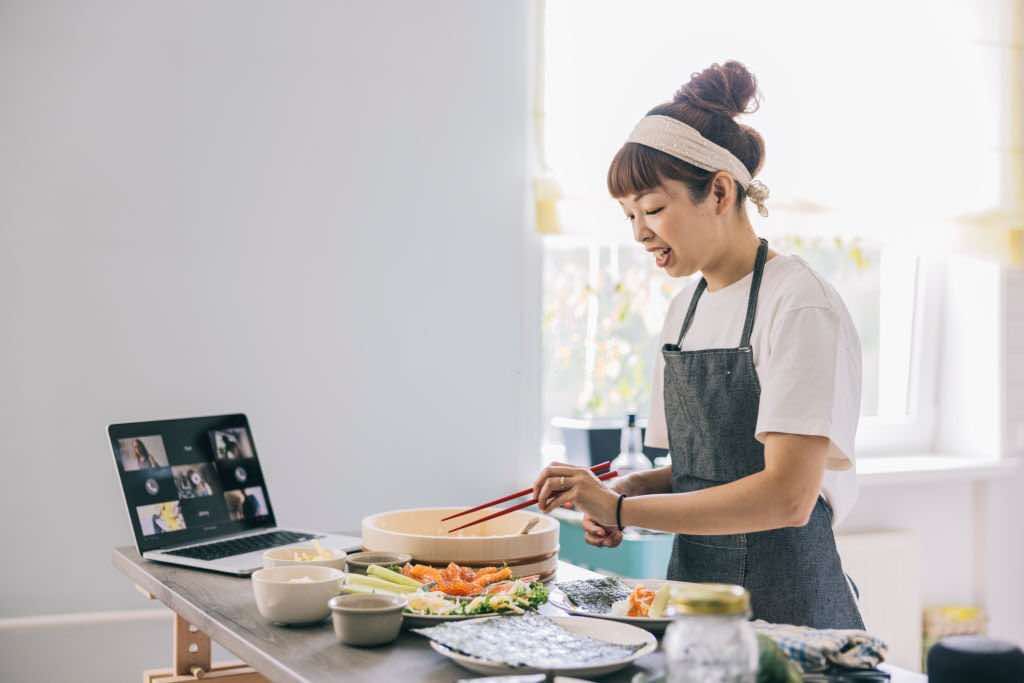
A note on virtual cooking classes
You might be wondering whether to host an in-person cooking class or a live online cooking class. They each have their pros and cons.
In-person cooking classes have several advantages, such as being able to:
- Gauge each guest’s skill level
- Provide an in-person cooking demo
- Run a cooking competition
- Standardize the ingredient kit for all attendees
- Help guests master the right technique, knife skills, etc. to create a delicious meal
- Allow your attendees to taste delicious dishes
However, you’re limited by the amount of space you have, and there are many upfront costs to pay.
An online class or virtual event has its own advantages, such as:
- Not paying for space, pest control, cooking equipment, ingredient kits, etc.
- Allowing you to serve many more attendees per class
- Allowing attendees to cook with their families from the comfort of their homes
- Virtually zero transportation costs for all
But there are also cons to hosting a virtual cooking class. With a virtual class, you can’t gauge each guest’s skill level accurately, there’s limited engagement between attendees, and the ingredients and cooking equipment used may vary.
A Zoom cooking class and a live cooking lesson both impart culinary education through a professional chef. Pick the format that works best for you based on available time, money, and resources.
Final thoughts
A cooking class requires thoughtful planning to ensure success. Gauging interest first lets you plan your event correctly and profitably.
Finding the right venue and providing a great experience ensures repeat attendance for future classes. Gathering data improves future planning and sets the right expectations.
Use the tips in this post to plan your next event, and let us know what you think on LinkedIn (Mo or Lee) and Twitter.